はじめに
AI 使ってみたいけど何からやってみようかな???
Microsoft Azure の音声サービス 【Azure Speech SDK】 を使って音声をテキスト変換を体験してみませんか?
Azure Speech SDK ではリアルタイムでの音声や音声ファイルからもテキスト変換が行えるようなので検証していきます!
今回の検証では以下の方々を想定した記事となっています。
- これからAIを使って何かしてみたいけど何からやればいいかわからない方
- Azure を触ったことがある方(Azureアカウントを持っている)
- 音声サービスを試してみたい方
開発環境
Windows 10
Python 3.6
Anaconda
Azure Speech SDK
マイクから音声を認識する
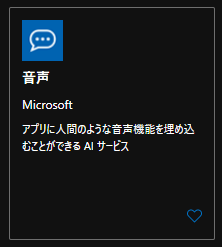
1.Azureポータルにログインして、音声サービスを作成します。
2.作成したリソースへ移動し、キーと場所をコピーしておいてください。

3.Python 3.6環境を作成します。
conda create -n py36 python=3.6
conda activate py36
4.ライブラリをインストールします。
pip install azure-cognitiveservices-speech5.プログラムを作成します。
一度だけ音声入力して認識結果を表示するプログラムです。”YourSubscriptionKey”に先ほどコピーしたキーを, “YourServiceRegion”に先ほどコピーした場所を貼り付けてください。日本語を認識したいのでlanguageは”ja-JP”にします。
stt.py
import azure.cognitiveservices.speech as speechsdk

# Creates an instance of a speech config with specified subscription key and service region.
# Replace with your own subscription key and service region (e.g., "westus").
speech_key, service_region, language = "YourSubscriptionKey", "YourServiceRegion", "ja-JP"
speech_config = speechsdk.SpeechConfig(subscription=speech_key, region=service_region)

# Creates a recognizer with the given settings
speech_recognizer = speechsdk.SpeechRecognizer(speech_config=speech_config)

print("Say something...")

# Starts speech recognition, and returns after a single utterance is recognized. The end of a
# single utterance is determined by listening for silence at the end or until a maximum of 15
# seconds of audio is processed.  The task returns the recognition text as result.
# Note: Since recognize_once() returns only a single utterance, it is suitable only for single
# shot recognition like command or query.
# For long-running multi-utterance recognition, use start_continuous_recognition() instead.
result = speech_recognizer.recognize_once()

# Checks result.
if result.reason == speechsdk.ResultReason.RecognizedSpeech:
    print("Recognized: {}".format(result.text))
elif result.reason == speechsdk.ResultReason.NoMatch:
    print("No speech could be recognized: {}".format(result.no_match_details))
elif result.reason == speechsdk.ResultReason.Canceled:
    cancellation_details = result.cancellation_details
    print("Speech Recognition canceled: {}".format(cancellation_details.reason))
    if cancellation_details.reason == speechsdk.CancellationReason.Error:
        print("Error details: {}".format(cancellation_details.error_details))
こちらは継続的に音声入力して、認識結果を表示するプログラムです。同様にキーと場所、言語の設定をお願いします。
stt.py
import azure.cognitiveservices.speech as speechsdk
import time

# Creates an instance of a speech config with specified subscription key and service region.
# Replace with your own subscription key and service region (e.g., "westus").
speech_key, service_region, language = "YourSubscriptionKey", "YourServiceRegion", "ja-JP"
speech_config = speechsdk.SpeechConfig(
    subscription=speech_key, region=service_region, speech_recognition_language=language)

# Creates a recognizer with the given settings
speech_recognizer = speechsdk.SpeechRecognizer(speech_config=speech_config)

print("Say something...")

def recognized(evt):
    print('「{}」'.format(evt.result.text))
# do something

def start(evt):
    print('SESSION STARTED: {}'.format(evt))

def stop(evt):
    print('SESSION STOPPED {}'.format(evt))

speech_recognizer.recognized.connect(recognized)
speech_recognizer.session_started.connect(start)
speech_recognizer.session_stopped.connect(stop)

try:
    speech_recognizer.start_continuous_recognition()
    time.sleep(60)
except KeyboardInterrupt:
    print("bye.")
    speech_recognizer.recognized.disconnect_all()
    speech_recognizer.session_started.disconnect_all()
    speech_recognizer.session_stopped.disconnect_all()
6.下記コマンドを実行し、話しかけてみてください。
python stt.py認識結果が以下のように表示されます。

2.プログラムを作成します。
.wavファイルを読み込み、音声認識結果を表示するプログラムです。キーと場所を設定してください。
stt_from_file.py
import azure.cognitiveservices.speech as speechsdk

# Creates an instance of a speech config with specified subscription key and service region.
# Replace with your own subscription key and region identifier from here: https://aka.ms/speech/sdkregion
speech_key, service_region = "YourSubscriptionKey", "YourServiceRegion"
speech_config = speechsdk.SpeechConfig(subscription=speech_key, region=service_region)

# Creates an audio configuration that points to an audio file.
# Replace with your own audio filename.
audio_filename = "aboutSpeechSdk.wav"
audio_input = speechsdk.audio.AudioConfig(filename=audio_filename)

# Creates a recognizer with the given settings
speech_recognizer = speechsdk.SpeechRecognizer(speech_config=speech_config, audio_config=audio_input)

print("Recognizing first result...")

# Starts speech recognition, and returns after a single utterance is recognized. The end of a
# single utterance is determined by listening for silence at the end or until a maximum of 15
# seconds of audio is processed.  The task returns the recognition text as result.
# Note: Since recognize_once() returns only a single utterance, it is suitable only for single
# shot recognition like command or query.
# For long-running multi-utterance recognition, use start_continuous_recognition() instead.
result = speech_recognizer.recognize_once()

# Checks result.
if result.reason == speechsdk.ResultReason.RecognizedSpeech:
    print("Recognized: {}".format(result.text))
elif result.reason == speechsdk.ResultReason.NoMatch:
    print("No speech could be recognized: {}".format(result.no_match_details))
elif result.reason == speechsdk.ResultReason.Canceled:
    cancellation_details = result.cancellation_details
    print("Speech Recognition canceled: {}".format(cancellation_details.reason))
    if cancellation_details.reason == speechsdk.CancellationReason.Error:
        print("Error details: {}".format(cancellation_details.error_details))
音声ファイルはcognitive-services-speech-sdkにあるsampledata\audiofiles\aboutSpeechSdk.wavを用います。
3.下記コマンドを実行し、結果を見てみましょう。
python stt_from_file.pyキーと場所が正しくないと下記のようなエラーが出ます。
(py36) C:\Users\good_\Documents\PythonProjects\AzureSpeech>python stt_from_file.py
Recognizing first result...
Speech Recognition canceled: CancellationReason.Error
Error details: Connection failed (no connection to the remote host). Internal error: 1. Error details: 11001. Please check network connection, firewall setting, and the region name used to create speech factory. SessionId: 77ad7686a9d94b7882398ae8b855d903
結果は下記のようになりました

52秒あるのですが、最初の一行を認識したら、終了してしまうようです。
4.継続的に読み込み、音声認識するためには、下記のようにします。
stt_from_file.py
import azure.cognitiveservices.speech as speechsdk
import time

# Creates an instance of a speech config with specified subscription key and service region.
# Replace with your own subscription key and region identifier from here: https://aka.ms/speech/sdkregion
speech_key, service_region = "YourSubscriptionKey", "YourServiceRegion"
speech_config = speechsdk.SpeechConfig(subscription=speech_key, region=service_region)

# Creates an audio configuration that points to an audio file.
# Replace with your own audio filename.
audio_filename = "aboutSpeechSdk.wav"
audio_input = speechsdk.audio.AudioConfig(filename=audio_filename)

# Creates a recognizer with the given settings
speech_recognizer = speechsdk.SpeechRecognizer(speech_config=speech_config, audio_config=audio_input)

print("Recognizing...")

def recognized(evt):
    print('「{}」'.format(evt.result.text))
# do something

def start(evt):
    print('SESSION STARTED: {}'.format(evt))

def stop(evt):
    print('SESSION STOPPED {}'.format(evt))

speech_recognizer.recognized.connect(recognized)
speech_recognizer.session_started.connect(start)
speech_recognizer.session_stopped.connect(stop)

try:
    speech_recognizer.start_continuous_recognition()
    time.sleep(60)
except KeyboardInterrupt:
    print("bye.")
    speech_recognizer.recognized.disconnect_all()
    speech_recognizer.session_started.disconnect_all()
    speech_recognizer.session_stopped.disconnect_all()
5.再度実行してみましょう。
5.再度実行してみましょう。
下記のように継続的に音声認識できているようです!

お疲れ様でした。
最後に
Azure Speech SDK を使って会議の議事録などを自動化できるかもしれないですね!
次回は少し長めの音声でどのくらいテキスト変換できるのか試してみたいと思います!
最後まで読んでいただきありがとうございました。