はじめに
HoloLensアドベントカレンダー1日目の記事です!
APIよくわからないと弟子から相談があったので、Cognitive Services系をまとめていきたいと思いまーす。
今日は、Cognitive ServicesのFace APIをHoloLens2でやってみました。
実機なしでもできるのでやってみてください。
開発環境
- Azure
- Face API
- HoloLens2
- Unity 2019.4.1f1
- MRTK 2.5.1
- OpenCV for Unity
- Windows PC
導入
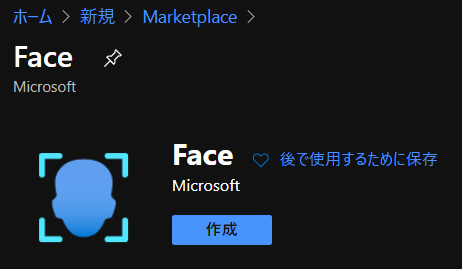
1.AzureポータルからFace APIを作成し、エンドポイントとサブスクリプションキーをメモしておいてください。

2.Unityでプロジェクトを作成、MRTK2.5.1をインポートします。なんかウィンドウでたらApplyします。
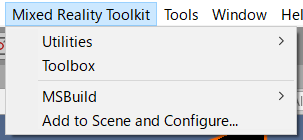
3.メニューのMixed Reality Toolkit->Add to Scene and Configureしてください。
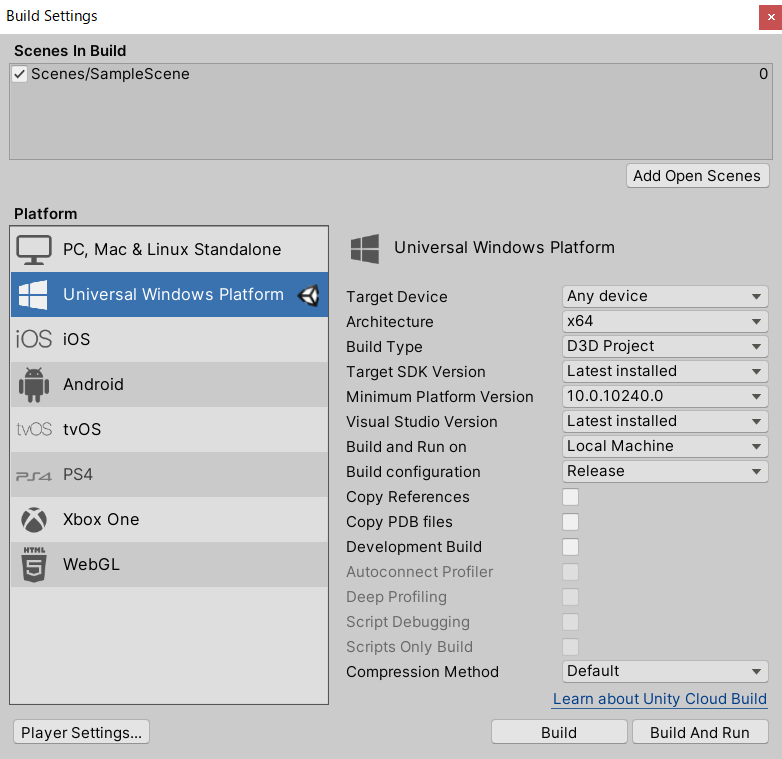
4.Build Settingsから、Universal Windows PlatformにSwitch Platformして、以下のように設定してください。あとAdd Open ScenesでScenes/SampleSceneにチェックが入っていることを確認します。
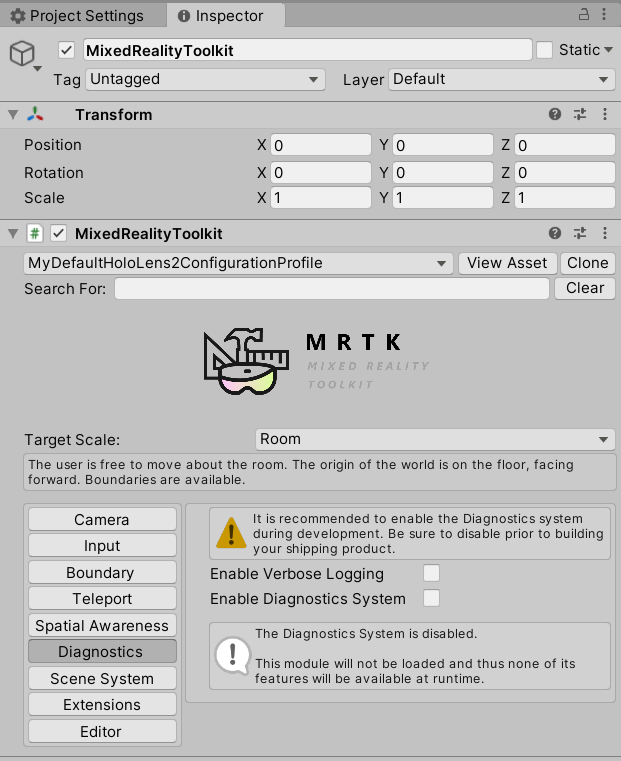
5.MixedRealityToolkitのDefaultHoloLens2ConfigureProfileをcloneし、Diagnostics->Enable Diagnostics Systemのチェックを外します。これでCPU使用率とかのデバッグ情報を非表示にできます。
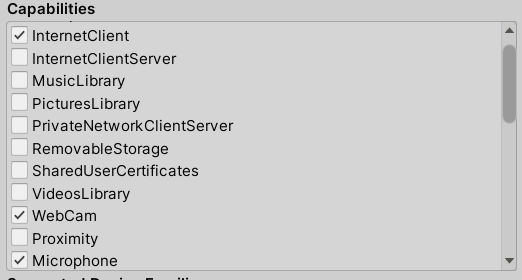
6.Project SettingsのXR Settings、Publishing Settings->Capabilitiesを以下のように設定してください。

7.空のGameObjectを作成し、名前を「TapToCapture」にします。
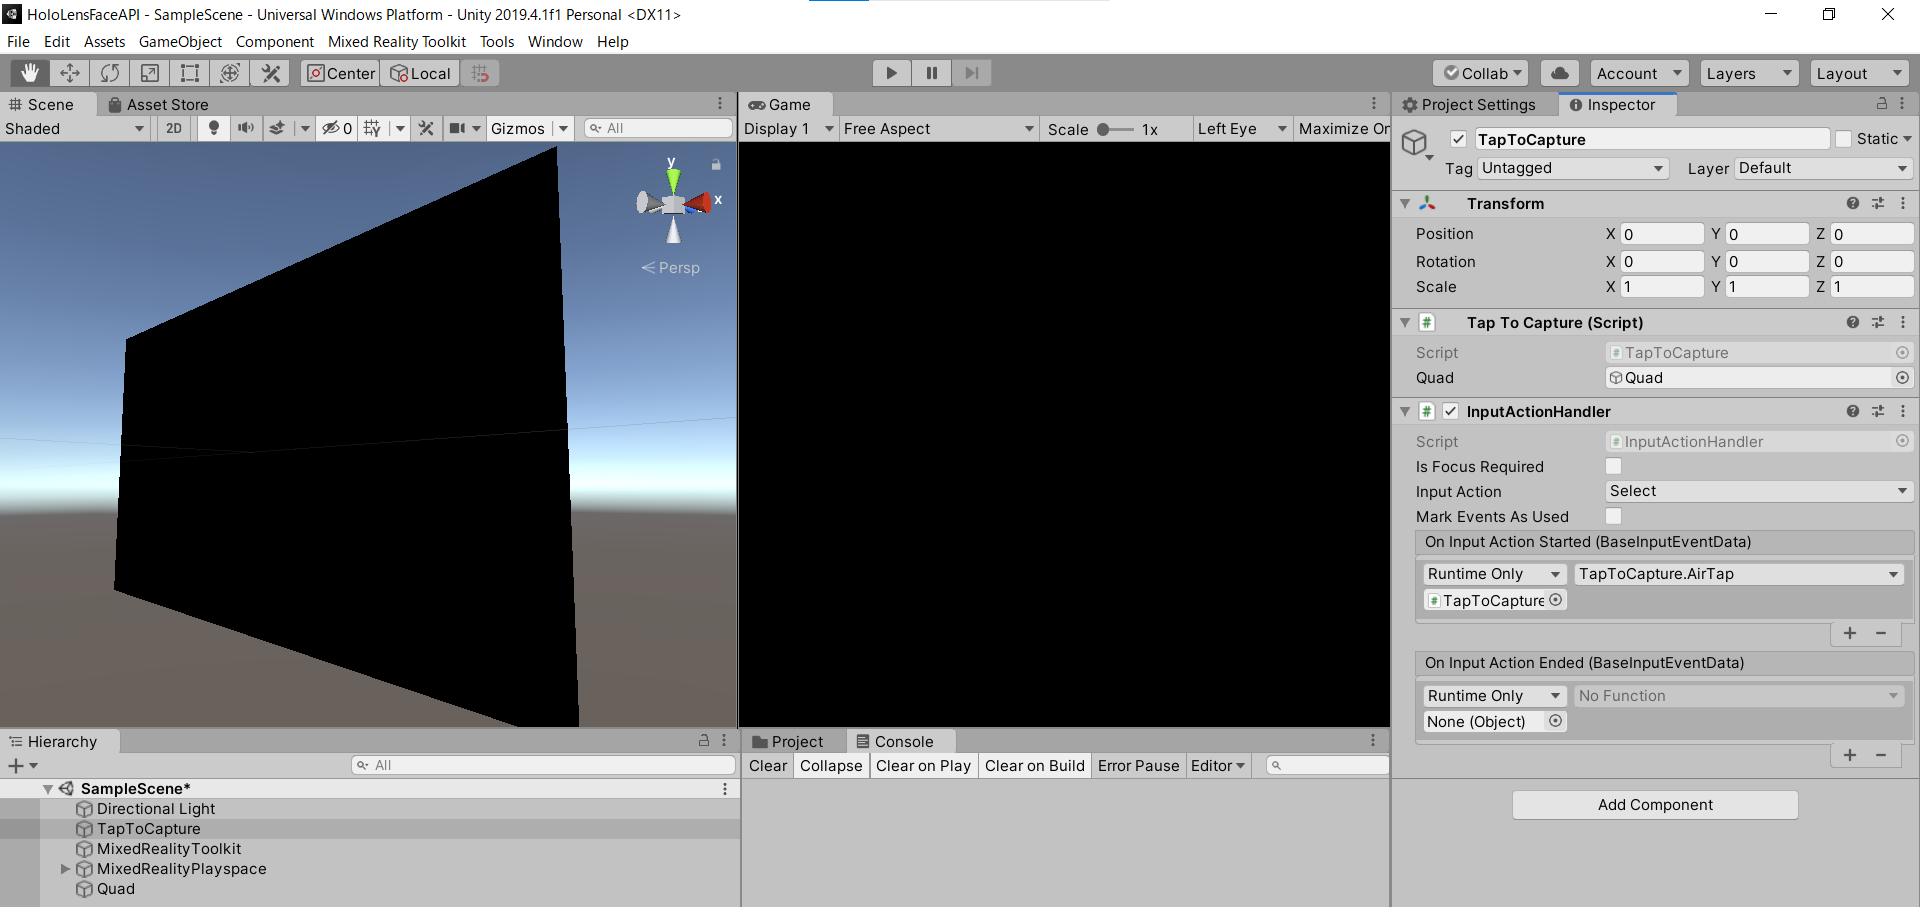
8.Add Componentから「TapToCapture.cs」スクリプトを作成します。エアタップしたら、画像をキャプチャし、Face APIに投げるスクリプトになります。
|
1 2 3 4 5 6 7 8 9 10 11 12 13 14 15 16 17 18 19 20 21 22 23 24 25 26 27 28 29 30 31 32 33 34 35 36 37 38 39 40 41 42 43 44 45 46 47 48 49 50 51 52 53 54 55 56 57 58 59 60 61 62 63 64 65 66 67 68 69 70 71 72 73 74 75 76 77 78 79 80 81 82 83 84 85 86 87 88 89 90 91 92 93 94 95 96 97 98 99 100 101 102 103 104 105 106 107 108 109 110 111 112 113 114 115 116 117 118 119 120 121 122 123 124 125 126 127 128 129 130 131 132 133 134 135 136 137 138 139 140 141 142 143 144 145 146 147 148 149 150 151 152 153 |
TapToCapture.cs using System.Collections; using System.Collections.Generic; using System.Linq; using System; using UnityEngine; using Microsoft.MixedReality.Toolkit.Utilities; using System.Threading.Tasks; using OpenCVForUnity.CoreModule; using OpenCVForUnity.UnityUtils; using OpenCVForUnity.ImgprocModule; public class TapToCapture : MonoBehaviour { public GameObject quad; [System.Serializable] public class Face { public string faceId; public FaceRectangle faceRectangle; public FaceAttribute faceAttributes; } [System.Serializable] public class FaceRectangle { public int top; public int left; public int width; public int height; } [System.Serializable] public class FaceAttribute { public float age; public string gender; } UnityEngine.Windows.WebCam.PhotoCapture photoCaptureObject = null; Texture2D targetTexture = null; private string endpoint = "https:///face/v1.0/detect"; private string subscription_key = ""; private bool waitingForCapture; void Start(){ waitingForCapture = false; } public void AirTap() { if (waitingForCapture) return; waitingForCapture = true; Resolution cameraResolution = UnityEngine.Windows.WebCam.PhotoCapture.SupportedResolutions.OrderByDescending((res) => res.width * res.height).First(); targetTexture = new Texture2D(cameraResolution.width, cameraResolution.height); // PhotoCapture オブジェクトを作成します UnityEngine.Windows.WebCam.PhotoCapture.CreateAsync(false, delegate (UnityEngine.Windows.WebCam.PhotoCapture captureObject) { photoCaptureObject = captureObject; UnityEngine.Windows.WebCam.CameraParameters cameraParameters = new UnityEngine.Windows.WebCam.CameraParameters(); cameraParameters.hologramOpacity = 0.0f; cameraParameters.cameraResolutionWidth = cameraResolution.width; cameraParameters.cameraResolutionHeight = cameraResolution.height; cameraParameters.pixelFormat = UnityEngine.Windows.WebCam.CapturePixelFormat.BGRA32; // カメラをアクティベートします photoCaptureObject.StartPhotoModeAsync(cameraParameters, delegate (UnityEngine.Windows.WebCam.PhotoCapture.PhotoCaptureResult result) { // 写真を撮ります photoCaptureObject.TakePhotoAsync(OnCapturedPhotoToMemoryAsync); }); }); } async void OnCapturedPhotoToMemoryAsync(UnityEngine.Windows.WebCam.PhotoCapture.PhotoCaptureResult result, UnityEngine.Windows.WebCam.PhotoCaptureFrame photoCaptureFrame) { // ターゲットテクスチャに RAW 画像データをコピーします photoCaptureFrame.UploadImageDataToTexture(targetTexture); byte[] bodyData = targetTexture.EncodeToJPG(); Response response = new Response(); try { // string query = endpoint + "?detectionModel=detection_02&returnFaceId=true"; // string query = endpoint + "?detectionModel=detection_01&returnFaceId=true&returnFaceLandmarks=false&returnFaceAttributes=age,gender,headPose,smile,facialHair,glasses,emotion,hair,makeup,occlusion,accessories,blur,exposure,noise"; string query = endpoint + "?detectionModel=detection_01&returnFaceId=true&returnFaceAttributes=age,gender"; var headers = new Dictionary<string, string>(); headers.Add("Ocp-Apim-Subscription-Key", subscription_key); // headers.Add("Content-Type", "application/octet-stream"); response = await Rest.PostAsync(query, bodyData, headers, -1, true); } catch (Exception e) { photoCaptureObject.StopPhotoModeAsync(OnStoppedPhotoMode); return; } if (!response.Successful) { photoCaptureObject.StopPhotoModeAsync(OnStoppedPhotoMode); return; } Debug.Log(response.ResponseCode); Debug.Log(response.ResponseBody); string newResponseBody = "{ \"results\": " + response.ResponseBody + "}"; Face[] faces = JsonHelper.FromJson(newResponseBody); Mat imgMat = new Mat(targetTexture.height, targetTexture.width, CvType.CV_8UC4); Utils.texture2DToMat(targetTexture, imgMat); // Debug.Log("imgMat.ToString() " + imgMat.ToString()); foreach (var face in faces){ //Debug.Log(face.faceId); //Debug.Log(face.faceRectangle.left); //Debug.Log(face.faceRectangle.top); //Debug.Log(face.faceRectangle.width); //Debug.Log(face.faceRectangle.height); Imgproc.putText(imgMat, face.faceAttributes.age.ToString()+","+face.faceAttributes.gender, new Point(face.faceRectangle.left, face.faceRectangle.top-10), Imgproc.FONT_HERSHEY_SIMPLEX, 1.5, new Scalar(0, 0, 255, 255), 2, Imgproc.LINE_AA, false); Imgproc.rectangle(imgMat, new Point(face.faceRectangle.left, face.faceRectangle.top), new Point(face.faceRectangle.left + face.faceRectangle.width, face.faceRectangle.top + face.faceRectangle.height), new Scalar(0, 0, 255, 255), 2); } Texture2D texture = new Texture2D(imgMat.cols(), imgMat.rows(), TextureFormat.RGBA32, false); Utils.matToTexture2D(imgMat, texture); // テクスチャが適用されるゲームオブジェクトを作成 // GameObject quad = GameObject.CreatePrimitive(PrimitiveType.Quad); Renderer quadRenderer = quad.GetComponent() as Renderer; // quadRenderer.material = new Material(Shader.Find("Unlit/UnlitTexture")); // quad.transform.parent = this.transform; // quad.transform.localPosition = new Vector3(0.0f, 0.0f, 3.0f); quadRenderer.material.SetTexture("_MainTex", texture); // カメラを非アクティブにします photoCaptureObject.StopPhotoModeAsync(OnStoppedPhotoMode); } void OnStoppedPhotoMode(UnityEngine.Windows.WebCam.PhotoCapture.PhotoCaptureResult result) { // photo capture のリソースをシャットダウンします photoCaptureObject.Dispose(); photoCaptureObject = null; waitingForCapture = false; } } |
9.PhotoCaptureのサンプルはこちらです。エアタップしたら、画像キャプチャするようにInputActionHandlerをAdd Componentし、AirTap関数を作成します。エアタップ(On Input Action Started)したらAirTap関数が発火するように設定します。
10.撮影できたら、targetTextureに画像データが入っているので、JPGにエンコードして、Face APIに投げます。FaceAPIのサンプルはこちらC#、Pythonです。
11.endpointとsubscription_keyにメモしておいたものを貼り付けてください。
12.クエリパラメータは、detection_01モデルを使用、FaceId、年齢と性別を返すように設定しています。
|
1 |
https:///face/v1.0/detect?detectionModel=detection_01&returnFaceId=true&returnFaceAttributes=age,gender" |
ちなみにfaceAttributesはsmile, headPose, gender, age, facialHair, glasses, emotion, blur, exposure, noise, makeup, accessories, occlusion, hairといった情報が取れます。
13.MRTKのRestを用いてHTTPリクエストします。
ヘッダーは、”Ocp-Apim-Subscription-Key”: subscription_keyを指定、”Content-Type”: “application/octet-stream”はRestの中でやってくれるのでコメントアウトします。
14.クエリと画像データ、ヘッダーをPOSTします。
response = await Rest.PostAsync(query, bodyData, headers, -1, true);
15.response.ResponseBodyが下記のように返ってくればOKです。
|
1 |
[{"faceId":"f1b97cf1-58d0-4dc9-9169-e19cb0655e48","faceRectangle":{"top":347,"left":451,"width":285,"height":285},"faceAttributes":{"gender":"male","age":23.0}}] |
16.Face APIのResponseBodyがリストのjsonになっているので、パースできるようにJsonHelper.csスクリプトを作成します。
|
1 2 3 4 5 6 7 8 9 10 11 12 13 14 15 16 17 18 |
JsonHelper.cs using UnityEngine; using System; public class JsonHelper { public static T[] FromJson(string json) { Wrapper wrapper = JsonUtility.FromJson<Wrapper>(json); return wrapper.results; } [Serializable] private class Wrapper { public T[] results; } } |
JsonHelperについて
– yuiyoichi/JsonHelper.cs
– How to load an array with JsonUtility?
– UnityのJsonUtilityでJSON配列を処理する
17.返ってきたResponseBodyを次のようにすることで、パースすることが可能になります。
|
1 2 3 |
{ "results" : [ {...} ] } |
18.あとは仕様に合わせてFaceクラスとFaceRectangleクラス、FaceAttributeクラスを作成しました。
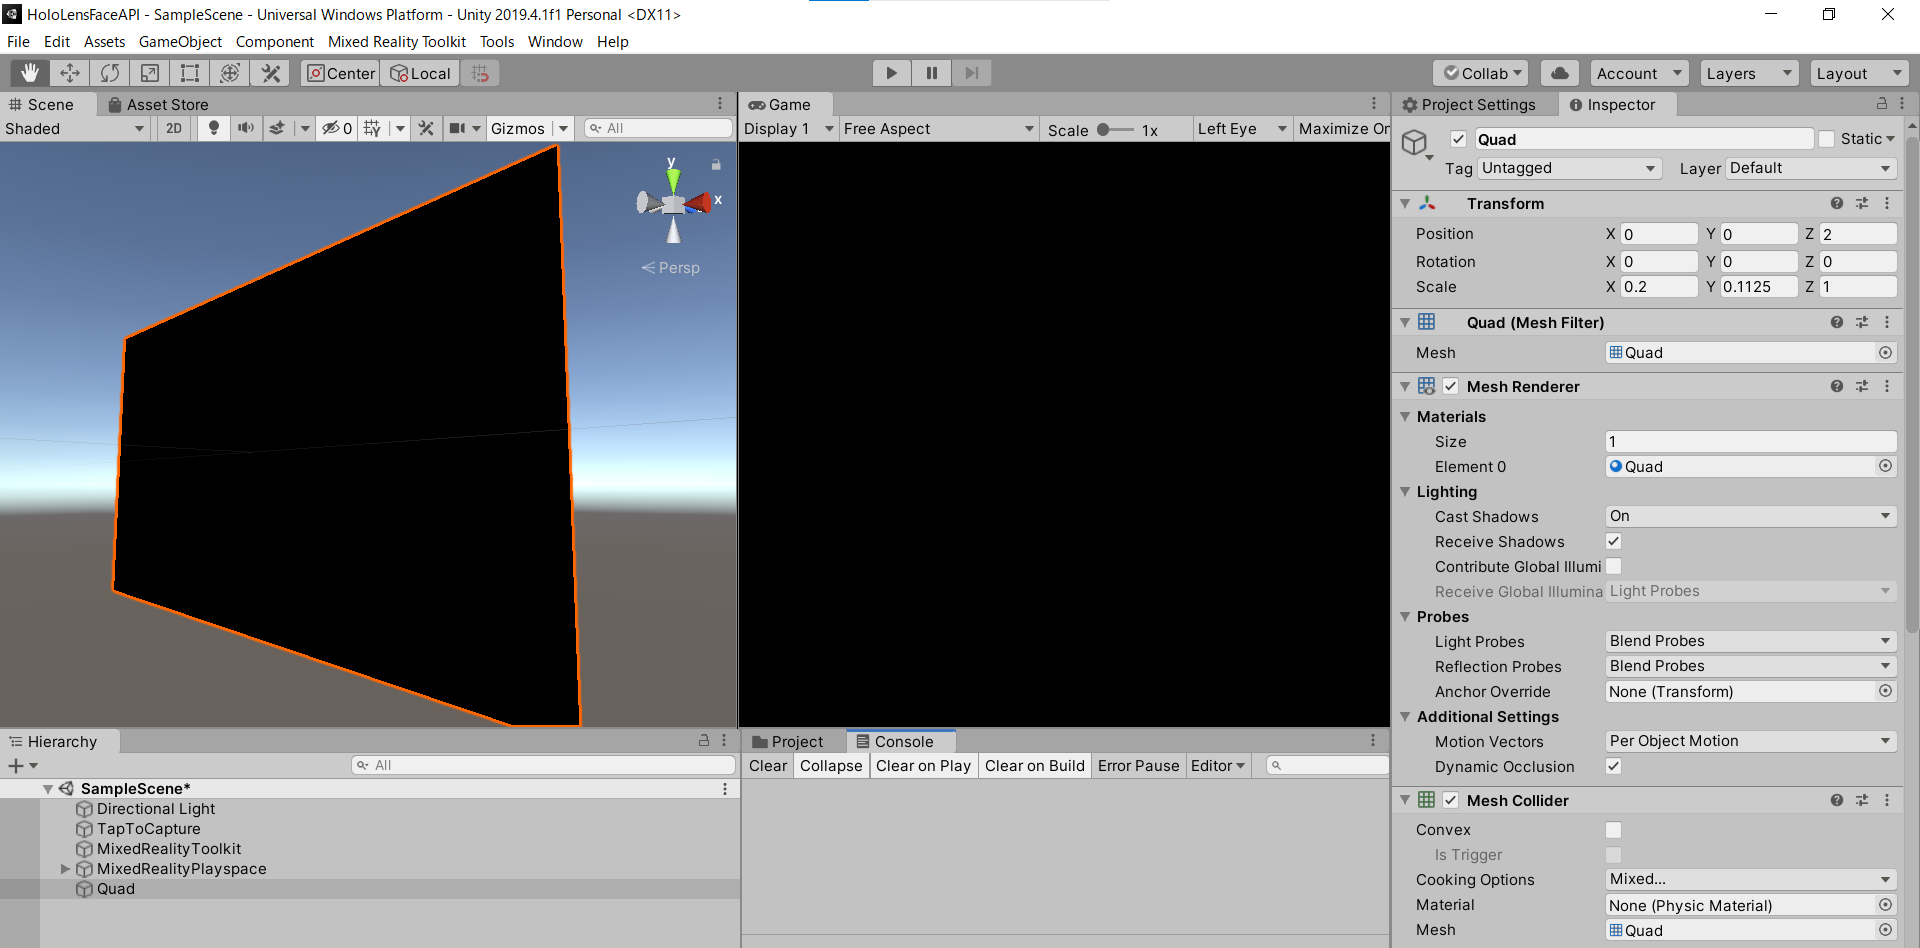
19.顔検出結果をOpenCVを使って画像に描画し、Quadのマテリアルに割り当てます。3D Object->Quadを作成しましょう。
OpenCV for Unity サンプルはこちら
– Texture2DからMatに変換
– 矩形を描画(Imgproc.rectangle)
– テキストを描画(Imgproc.putText)
20.OrbitalをAdd Componentし、Quadがカメラに追従するようにしています。
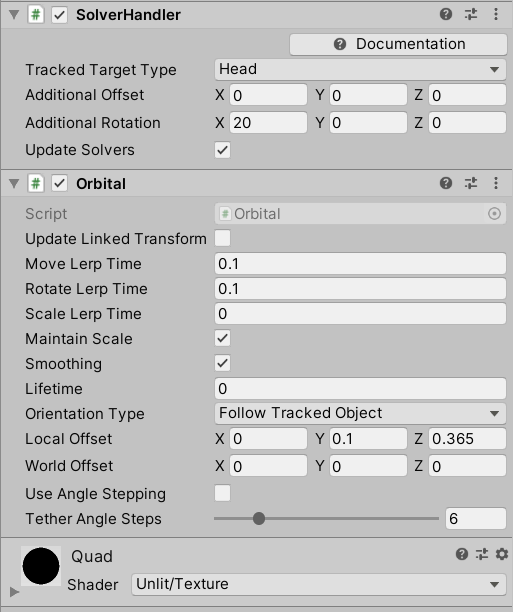
21.TapToCaptureにQuadをD&Dしてアタッチしたら完成です。
実行
HoloLens2にデプロイして、実行した結果がこちらになります。Editor上でもできるので試してみてください。
お疲れ様でした。
明日は弟子(@Horomoto-Asahi)による「HoloLens 2のSpatialAwarenessの調査」です。
