はじめに
HoloLensアドベントカレンダー2020の4日目の記事です。
前回に引き続き、Cognitive Services系をまとめていきまーす。
今日は、Azure Computer Vision APIの画像分析APIを用いて画像から視覚的特徴を抽出します。
例えば、下のサンプル画像を見て、「人通りの多い道」と説明してくれます。
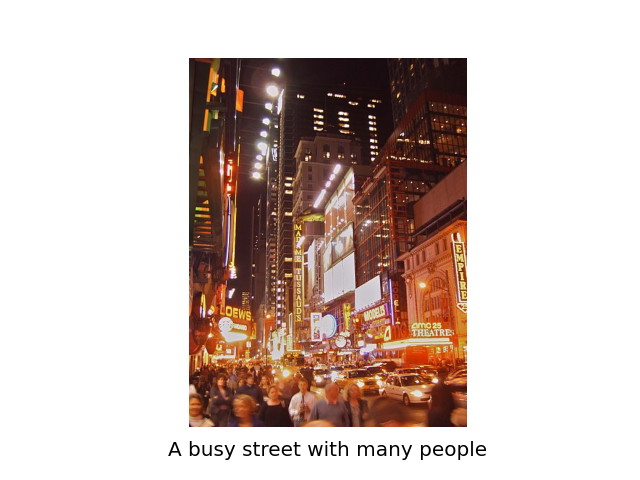
これで韓ドラ「スタートアップ」に出てきたアプリ「ヌンギル」が作れそうですね。
開発環境
- Azure
- Computer Vision API(画像分析 API)
- HoloLens2
- Unity 2019.4.1f1
- MRTK 2.5.1
- OpenCV for Unity
- Windows PC
導入
前回の顔検出をほぼほぼ使って、異なるところだけ説明していきます。
1.AzureポータルからComputer Vision APIを作成し、エンドポイントとサブスクリプションキーをメモしておいてください。
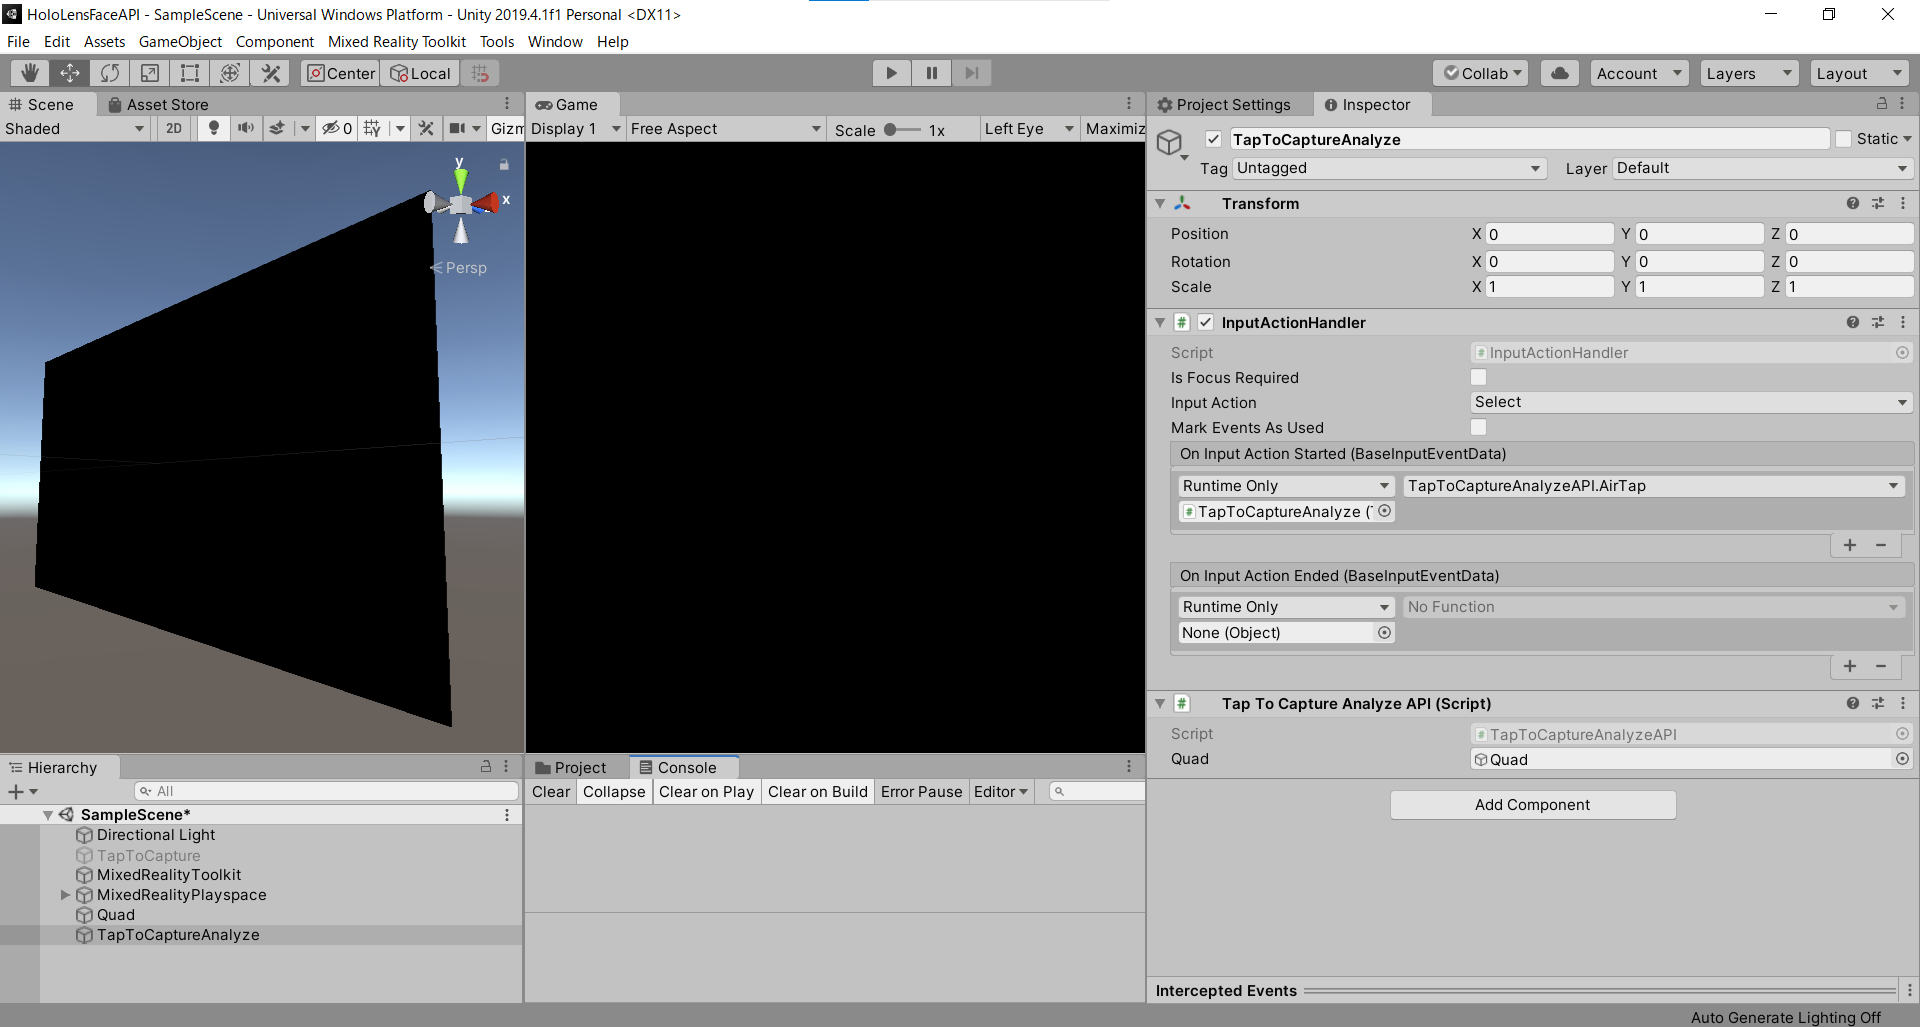
2.Unityのプロジェクトはこんな感じ。前回の「TapToCapture」を無効にして「TapToCaptureAnalyzeAPI」を作成しました。
3.「TapToCaptureAnalyzeAPI.cs」は、エアタップしたら画像をキャプチャし、Analyze APIに投げるスクリプトになります。
|
1 2 3 4 5 6 7 8 9 10 11 12 13 14 15 16 17 18 19 20 21 22 23 24 25 26 27 28 29 30 31 32 33 34 35 36 37 38 39 40 41 42 43 44 45 46 47 48 49 50 51 52 53 54 55 56 57 58 59 60 61 62 63 64 65 66 67 68 69 70 71 72 73 74 75 76 77 78 79 80 81 82 83 84 85 86 87 88 89 90 91 92 93 94 95 96 97 98 99 100 101 102 103 104 105 106 107 108 109 110 111 112 113 114 115 116 117 118 119 120 121 122 123 124 125 126 127 128 129 130 131 132 133 134 135 136 137 138 139 140 141 142 143 144 145 146 147 148 149 150 151 152 153 154 155 156 |
TapToCaptureAnalyzeAPI.cs using System.Collections; using System.Collections.Generic; using System.Linq; using System; using UnityEngine; using Microsoft.MixedReality.Toolkit.Utilities; using System.Threading.Tasks; using OpenCVForUnity.CoreModule; using OpenCVForUnity.UnityUtils; using OpenCVForUnity.ImgprocModule; public class TapToCaptureAnalyzeAPI : MonoBehaviour { public GameObject quad; [System.Serializable] public class Analyze { public Categories[] categories; public Color color; public Description description; public string requestId; public Metadata metadata; } [System.Serializable] public class Categories { public string name; public float score; } [System.Serializable] public class Color { public string dominantColorForeground; public string dominantColorBackground; public string[] dominantColors; public string accentColor; public bool isBwImg; public bool isBWImg; } [System.Serializable] public class Description { public string[] tags; public Captions[] captions; } [System.Serializable] public class Captions { public string text; public float confidence; } [System.Serializable] public class Metadata { public int height; public int width; public string format; } UnityEngine.Windows.WebCam.PhotoCapture photoCaptureObject = null; Texture2D targetTexture = null; private string endpoint = "https:///vision/v3.1/analyze"; private string subscription_key = ""; private bool waitingForCapture; void Start(){ waitingForCapture = false; } public void AirTap() { if (waitingForCapture) return; waitingForCapture = true; Resolution cameraResolution = UnityEngine.Windows.WebCam.PhotoCapture.SupportedResolutions.OrderByDescending((res) => res.width * res.height).First(); targetTexture = new Texture2D(cameraResolution.width, cameraResolution.height); // PhotoCapture オブジェクトを作成します UnityEngine.Windows.WebCam.PhotoCapture.CreateAsync(false, delegate (UnityEngine.Windows.WebCam.PhotoCapture captureObject) { photoCaptureObject = captureObject; UnityEngine.Windows.WebCam.CameraParameters cameraParameters = new UnityEngine.Windows.WebCam.CameraParameters(); cameraParameters.hologramOpacity = 0.0f; cameraParameters.cameraResolutionWidth = cameraResolution.width; cameraParameters.cameraResolutionHeight = cameraResolution.height; cameraParameters.pixelFormat = UnityEngine.Windows.WebCam.CapturePixelFormat.BGRA32; // カメラをアクティベートします photoCaptureObject.StartPhotoModeAsync(cameraParameters, delegate (UnityEngine.Windows.WebCam.PhotoCapture.PhotoCaptureResult result) { // 写真を撮ります photoCaptureObject.TakePhotoAsync(OnCapturedPhotoToMemoryAsync); }); }); } async void OnCapturedPhotoToMemoryAsync(UnityEngine.Windows.WebCam.PhotoCapture.PhotoCaptureResult result, UnityEngine.Windows.WebCam.PhotoCaptureFrame photoCaptureFrame) { // ターゲットテクスチャに RAW 画像データをコピーします photoCaptureFrame.UploadImageDataToTexture(targetTexture); byte[] bodyData = targetTexture.EncodeToJPG(); Response response = new Response(); try { string query = endpoint + "?visualFeatures=Categories,Description,Color"; var headers = new Dictionary<string, string>(); headers.Add("Ocp-Apim-Subscription-Key", subscription_key); response = await Rest.PostAsync(query, bodyData, headers, -1, true); } catch (Exception e) { photoCaptureObject.StopPhotoModeAsync(OnStoppedPhotoMode); return; } if (!response.Successful) { photoCaptureObject.StopPhotoModeAsync(OnStoppedPhotoMode); return; } Debug.Log(response.ResponseCode); Debug.Log(response.ResponseBody); Analyze analyze = JsonUtility.FromJson(response.ResponseBody); Debug.Log(analyze.description.captions[0].text); // OpenCVを用いて結果をて画像に書き込み Mat imgMat = new Mat(targetTexture.height, targetTexture.width, CvType.CV_8UC4); Utils.texture2DToMat(targetTexture, imgMat); Debug.Log("imgMat.ToString() " + imgMat.ToString()); Imgproc.putText(imgMat, analyze.description.captions[0].text, new Point(10, 100), Imgproc.FONT_HERSHEY_SIMPLEX, 4.0, new Scalar(255, 255, 0, 255), 4, Imgproc.LINE_AA, false); Texture2D texture = new Texture2D(imgMat.cols(), imgMat.rows(), TextureFormat.RGBA32, false); Utils.matToTexture2D(imgMat, texture); Renderer quadRenderer = quad.GetComponent() as Renderer; quadRenderer.material.SetTexture("_MainTex", texture); // カメラを非アクティブにします photoCaptureObject.StopPhotoModeAsync(OnStoppedPhotoMode); } void OnStoppedPhotoMode(UnityEngine.Windows.WebCam.PhotoCapture.PhotoCaptureResult result) { // photo capture のリソースをシャットダウンします photoCaptureObject.Dispose(); photoCaptureObject = null; waitingForCapture = false; } } |
4.endpointとsubscription_keyにメモしておいたものを貼り付けてください。
5.クエリパラメータはCategories,Description,Colorを指定しています。
|
1 |
endpoint + "?visualFeatures=Categories,Description,Color"; |
6.MRTKのRestを用いて、分析する画像をPOSTしたら、response.ResponseBodyが次のように返ってきます。
|
1 |
{'categories': [{'name': 'outdoor_', 'score': 0.00390625, 'detail': {'landmarks': []}}, {'name': 'outdoor_street', 'score': 0.33984375, 'detail': {'landmarks': []}}], 'color': {'dominantColorForeground': 'Brown', 'dominantColorBackground': 'Brown', 'dominantColors': ['Brown'], 'accentColor': 'B54316', 'isBwImg': False, 'isBWImg': False}, 'description': {'tags': ['building', 'outdoor', 'street', 'city', 'people', 'busy', 'night', 'ride', 'crowd'], 'captions': [{'text': 'a busy street with many people', 'confidence': 0.3540118634700775}]}, 'requestId': '88d8a3c6-8972-4315-8a15-b20bf14c33ce', 'metadata': {'height': 600, 'width': 450, 'format': 'Jpeg'}} |
7.今回はリストのJsonにはなっていないので、JsonHelperを使わずにJsonUtilityで読むことができます。
8.仕様に合わせてAnalyzeクラスとCategoriesクラス、Colorクラス、Descriptionクラス、Captionsクラス、Metadataクラスを作成しました。
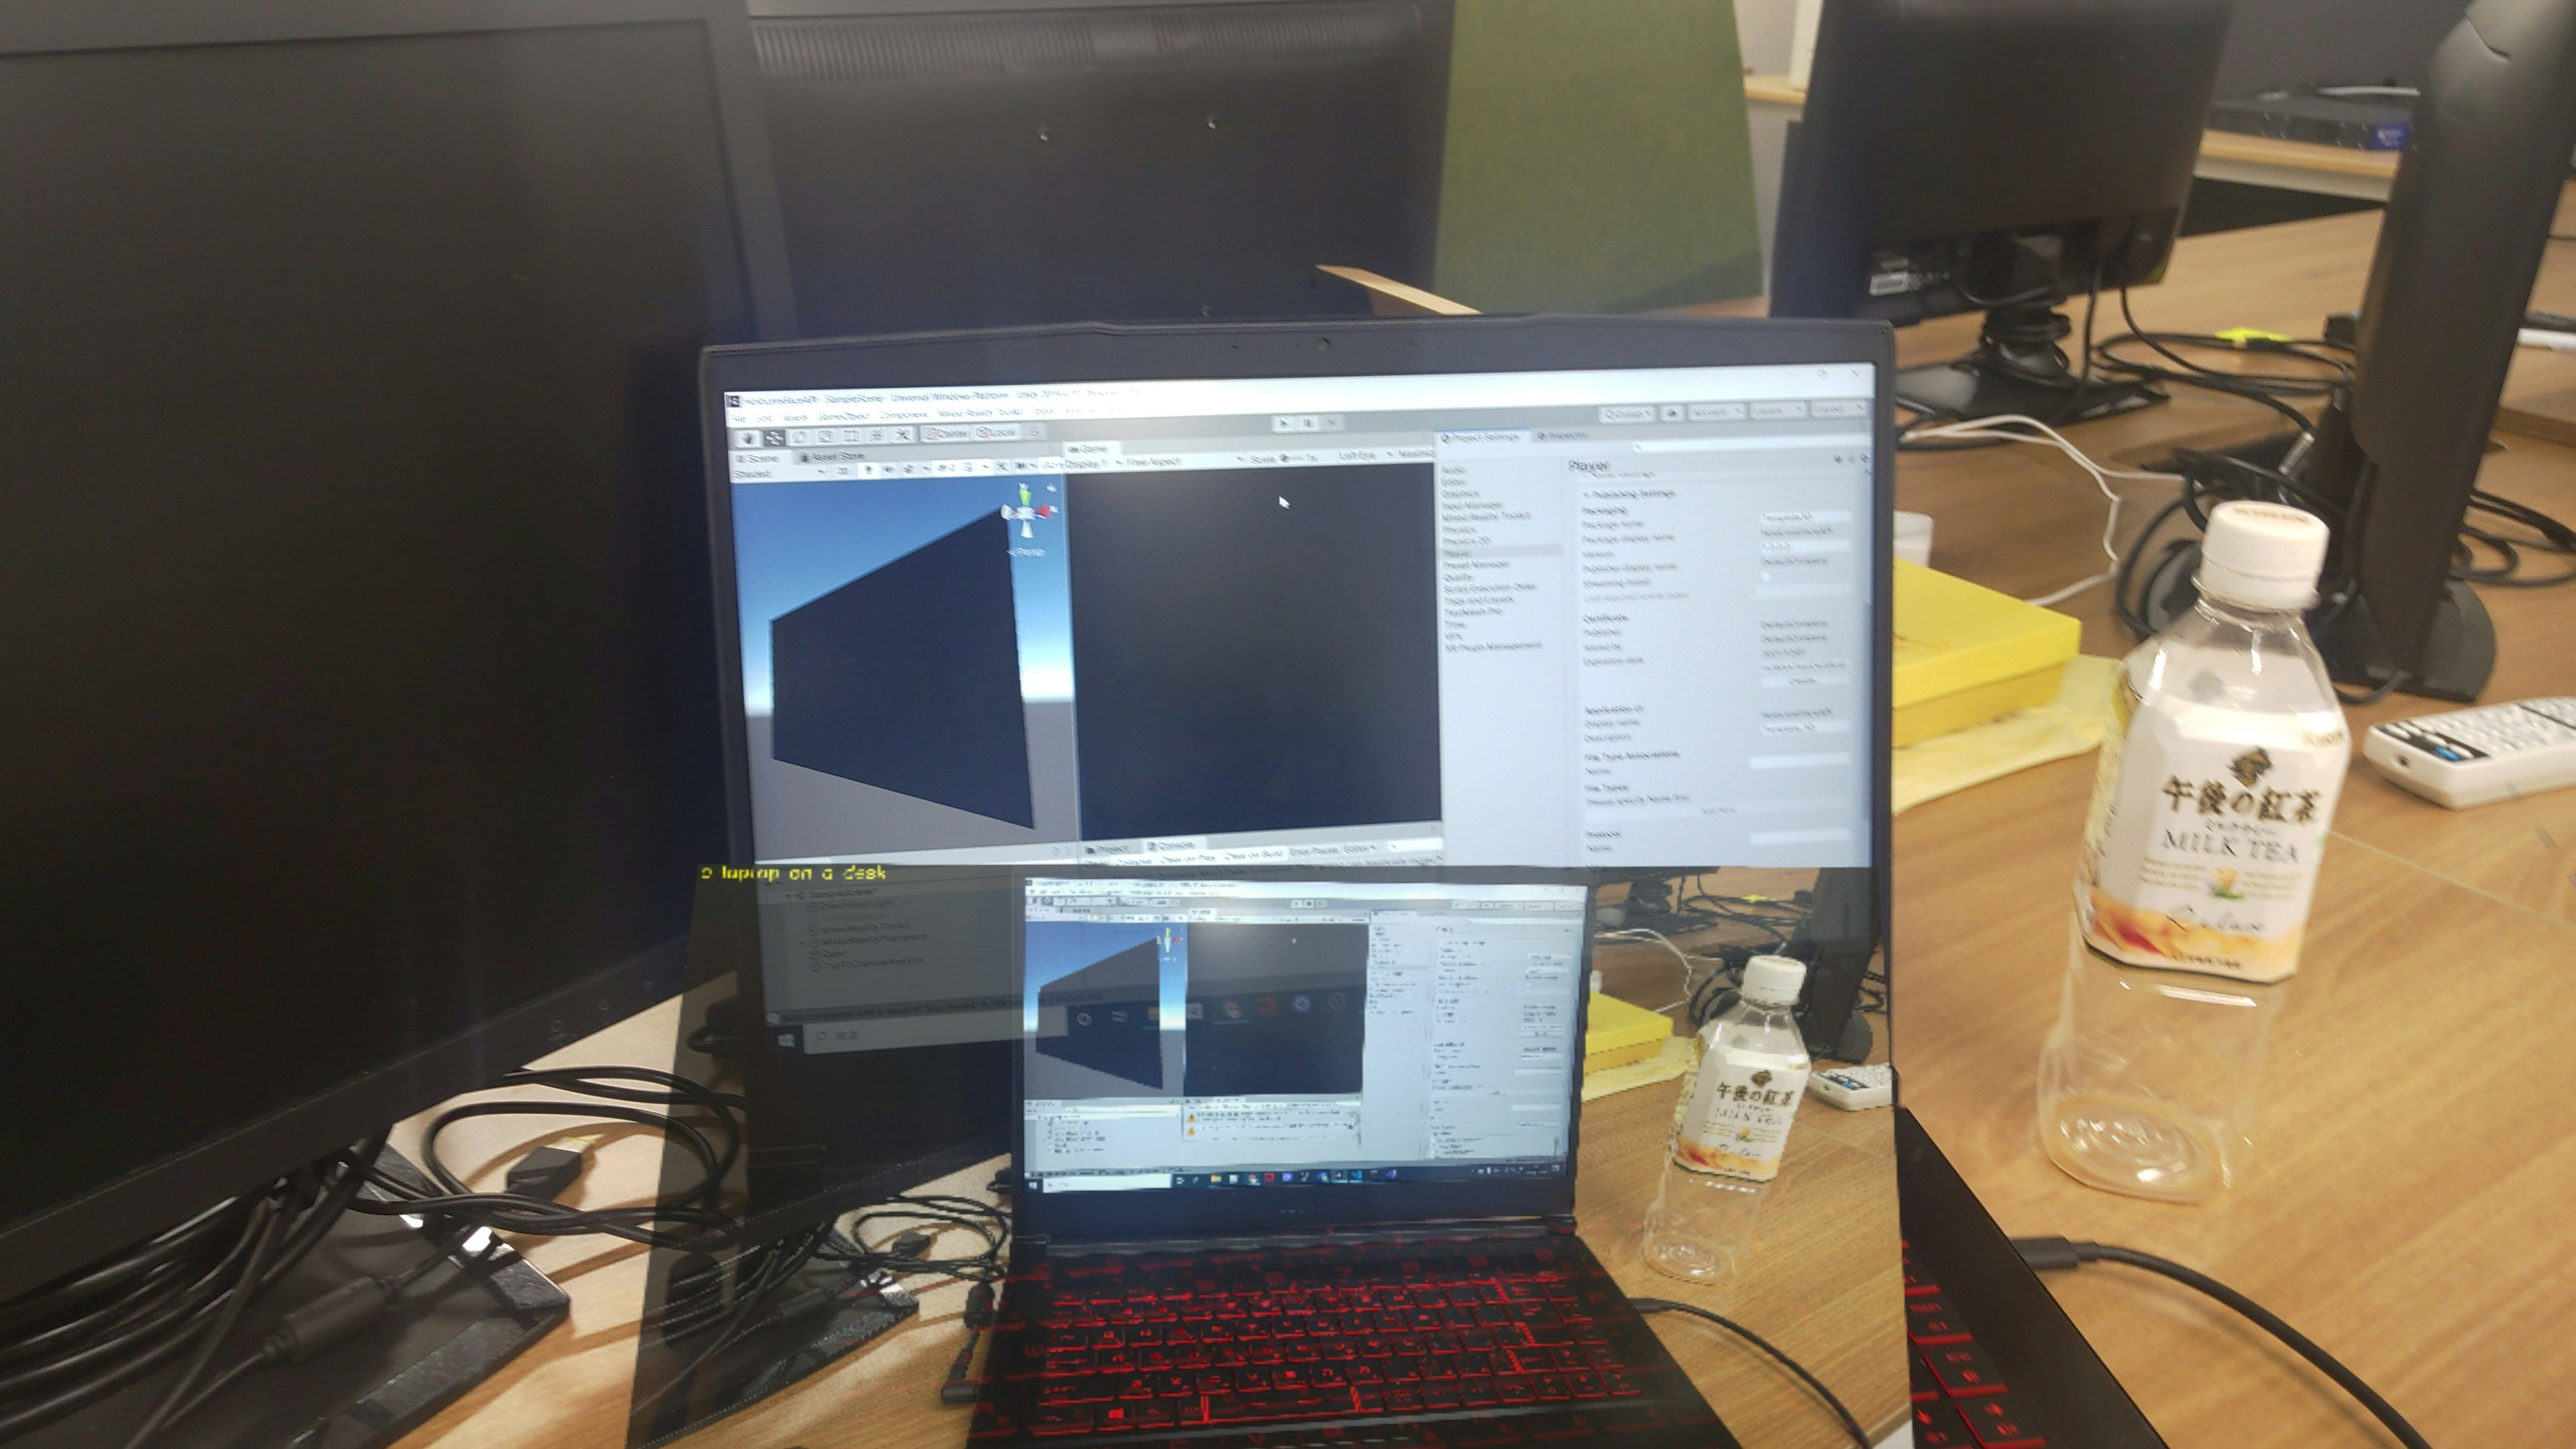
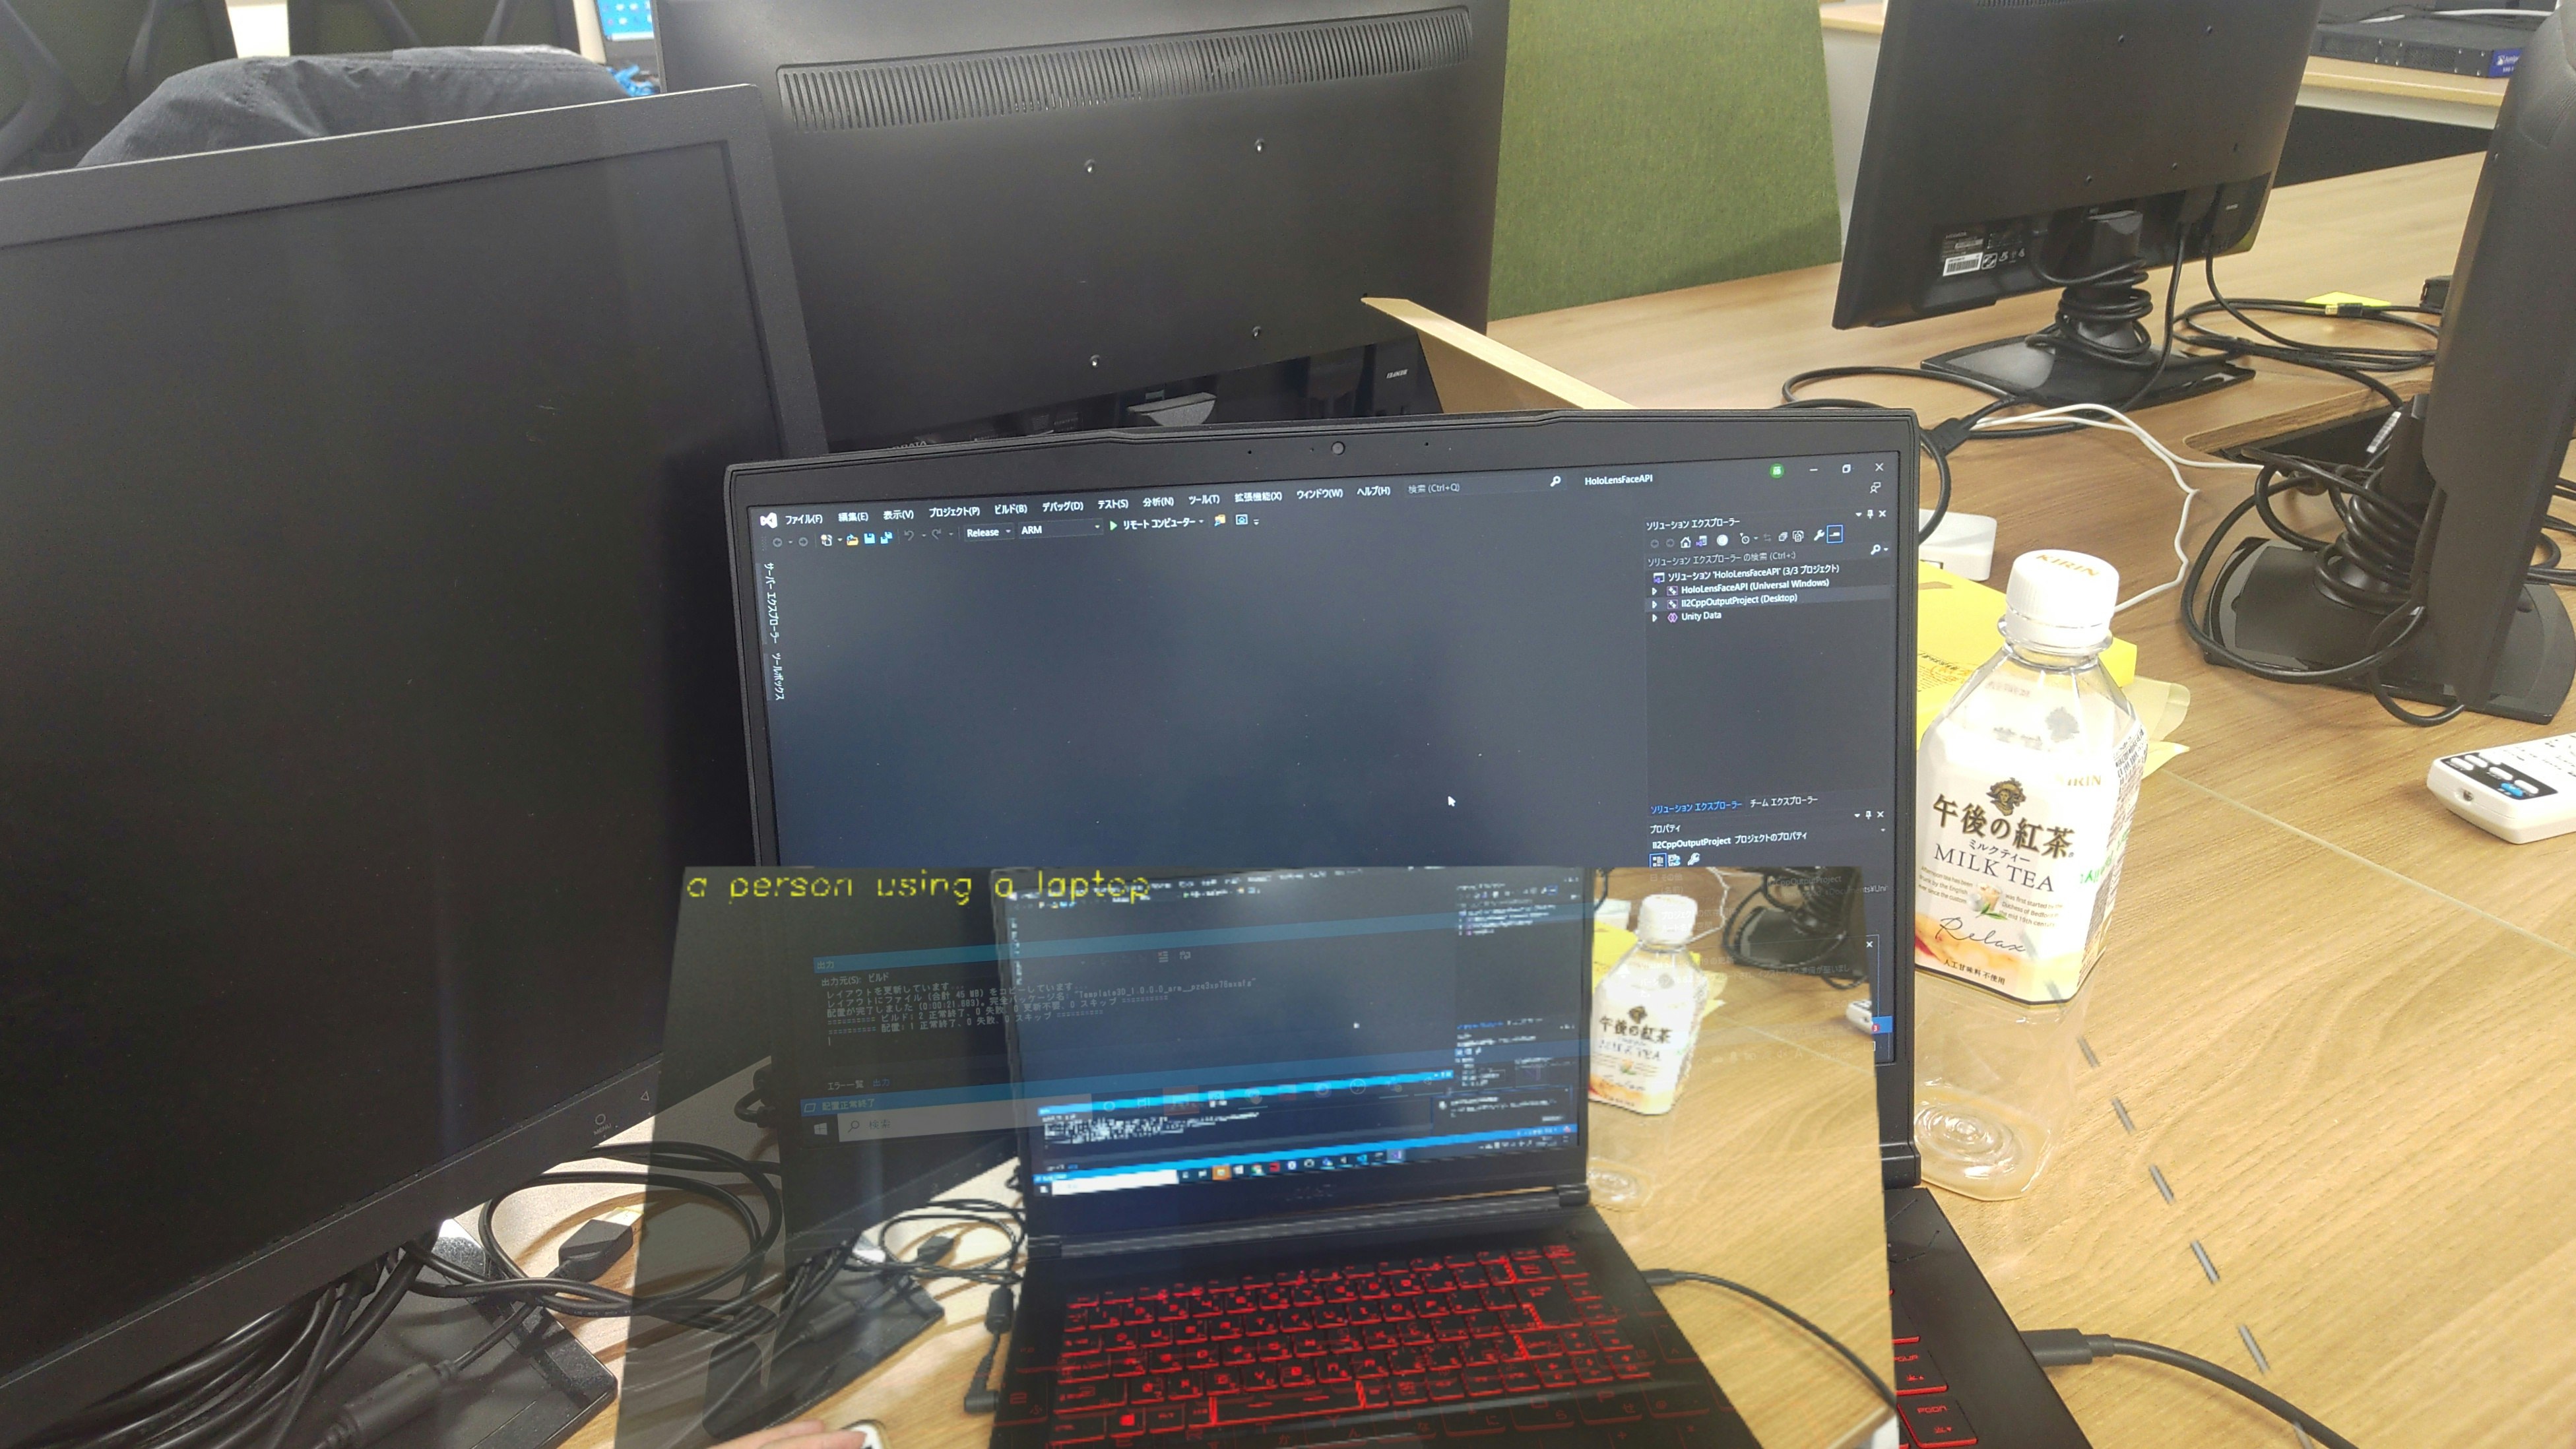
9.生成された画像説明文をOpenCVを用いて、画像に張り付けてquadのテクスチャに表示します。
実行
HoloLens2にデプロイして、実行した結果がこちらになります。Editor上でもできるので試してみてください。
この文章を読み上げさせたら、ヌンギルの完成ですね!
お疲れ様でした。
明日(というか遅れたので今日)は、弟子(@Horomoto-Asahi)による「Holo関連のなにか書きます」です。
参考
- Computer Vision のドキュメント
- ローカル画像の分析(C#、Python)

