Michaelです。
こんにちは、Michaelです。
今回から、Azure FunctionsとCognitive Servicesを使って画像内の顔を検出する仕組みを作成していきます。
3回目は、Azure FunctionsとOpenCVを使って、Face APIで顔検出した結果を画像に描画する仕組みを作成します。
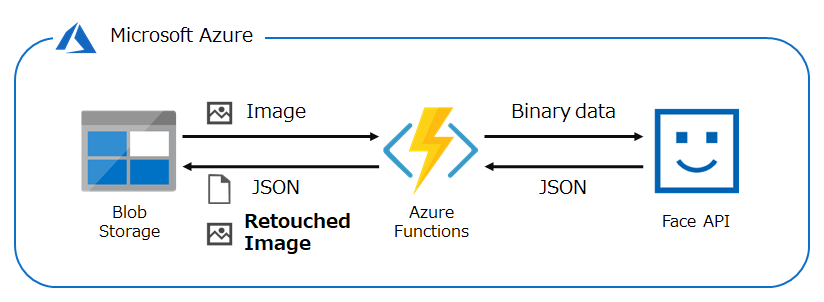
今回の構成
前回の構成に、画像をOpenCVで加工し、Blobストレージに格納する仕組みを追加します。
画像の加工はFace APIで取得できる顔位置の枠(faceRectangle)を描き込むだけの簡単な加工にとどめます。
バインドの設定
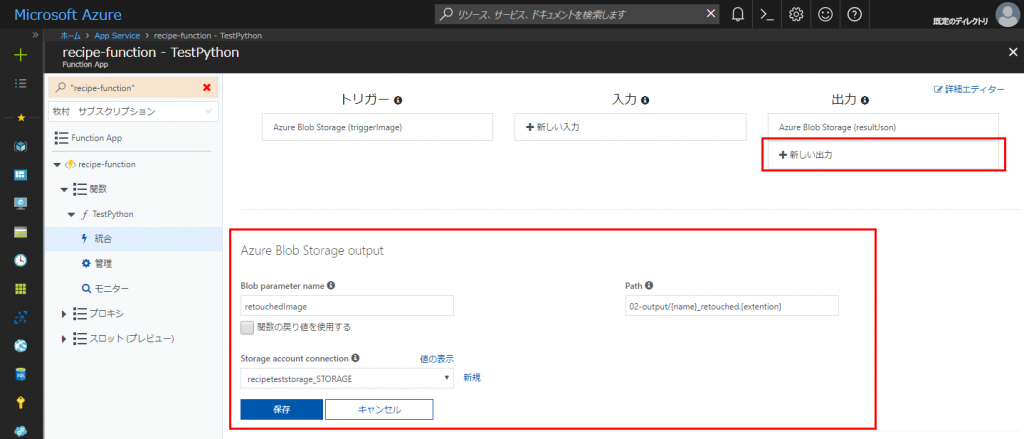
画像の出力が追加されるため、「出力」のバインドを追加します。
関数の「統合」で、まず「+新しい出力」をクリックし「Azure Blob Storage」のバインドを選択します。
出力画像に関しては、入力ファイルのフォーマットを維持するように加工するため、「{name}_retouched.{extention}」を設定し、ファイル名、拡張子を入力ファイルと揃えています。
Pythonスクリプト
スクリプトは以下のように作成しました。
|
1 2 3 4 5 6 7 8 9 10 11 12 13 14 15 16 17 18 19 20 21 22 23 24 25 26 27 28 29 30 31 32 33 34 35 36 37 38 39 40 41 42 43 44 45 46 47 48 49 50 51 52 53 54 55 56 57 58 59 60 61 62 63 64 65 66 67 68 69 70 71 72 73 74 75 76 77 78 79 80 81 82 83 84 85 86 87 88 89 90 91 92 93 94 |
# coding: utf-8 # 01‐ライブラリのインポート import os import json import requests import imghdr import cv2 def main(): input_img_path = os.environ["triggerImage"] result_path = os.environ["resultJson"] output_img_path = os.environ["retouchedImage"] # 02‐Face API未対応フォーマット判定 print("Checking input image format") img_format = imghdr.what(input_img_path) if img_format not in ["jpeg", "png", "bmp", "gif"]: status = {"status": "error"} if img_format == None: status["message"] = "Input file is not image." else: status["message"] = "Unsupported image format." print(status) with open(result_path, "w") as f: json.dump(status, f, indent=4) return # 03‐Face APIで顔検出 print("Detecting faces") face_api_location = "westus" face_api_key = "3acea513514b46c58f34ac0485e41d5b" url = "https://{location}.api.cognitive.microsoft.com/face/v1.0/{function}".format(location=face_api_location, function="detect") headers = { "Content-Type": "application/octet-stream", "Ocp-Apim-Subscription-Key": face_api_key } params = { "returnFaceId": True, "returnFaceLandmarks": False, "returnFaceAttributes": "age,gender,smile,emotion" } res = requests.request("POST", url, headers=headers, params=params, data=open(input_img_path, "rb")) detect_data = res.json() # 04‐顔検出結果をJSONで出力 print("Output detect result as JSON.") with open(result_path, "w") as f: json.dump(detect_data, f, indent=4) # 05‐画像の読み込み img = cv2.imread(input_img_path) # 06‐検出した顔ごとに枠追加 for face_info in detect_data: # face_rect = {key: value for key, value in face_info["faceRectangle"].items()} face_rect["right"] = face_rect["left"] + face_rect["width"] face_rect["bottom"] = face_rect["top"] + face_rect["height"] # 性別で枠の色を変更 if face_info["faceAttributes"]["gender"] == 'female': line_color = {"r":255,"g":63,"b":255} elif face_info["faceAttributes"]["gender"] == 'male': line_color = {"r":63,"g":255,"b":255} # 顔の枠描画 cv2.rectangle( img, (face_rect["left"], face_rect["top"]), (face_rect["right"], face_rect["bottom"]), (line_color["b"], line_color["g"], line_color["r"]), 2, 16 ) # 07‐加工済み画像を保存 print("Save retouched image as {}.".format(img_format.upper())) img_extention = "." + img_format cv2.imwrite(output_img_path + img_extention, img) os.rename(output_img_path + img_extention, output_img_path) if __name__ == "__main__": main() |
スクリプトの説明
スクリプトの内容は以下の通りです。「02‐Face API未対応フォーマット判定」~「04‐顔検出結果をJSONで出力」は前回と変わらないため、前回の記事を参照ください。
01‐ライブラリのインポート
処理に必要なライブラリを指定してインポートします。
今回はOpenCVを使って画像の加工を行うため、「cv2」を追加しています。
05‐画像の読み込み
アップロードされた画像をOpenCVで加工可能なNumPy配列として読み込みます。
06‐検出した顔ごとに枠追加
Face APIで検出した顔それぞれについて「faceRectangle」の情報をもとに、顔を検出した位置を示す枠を描画します。判定された性別ごとに異なる色の枠がつくように加工をしています。
07‐加工済み画像を一時保存
加工した画像をファイルに保存します。
OpenCVでは、画像フォーマットが保存する拡張子で決定されますが、Blob出力用のパスには拡張子がないため、直接指定するとエラーが発生します。
そこで、判定した画像フォーマットを拡張子として画像を保存し、画像のパスをBlob出力用にリネームすることでこの問題を回避します。
実行結果
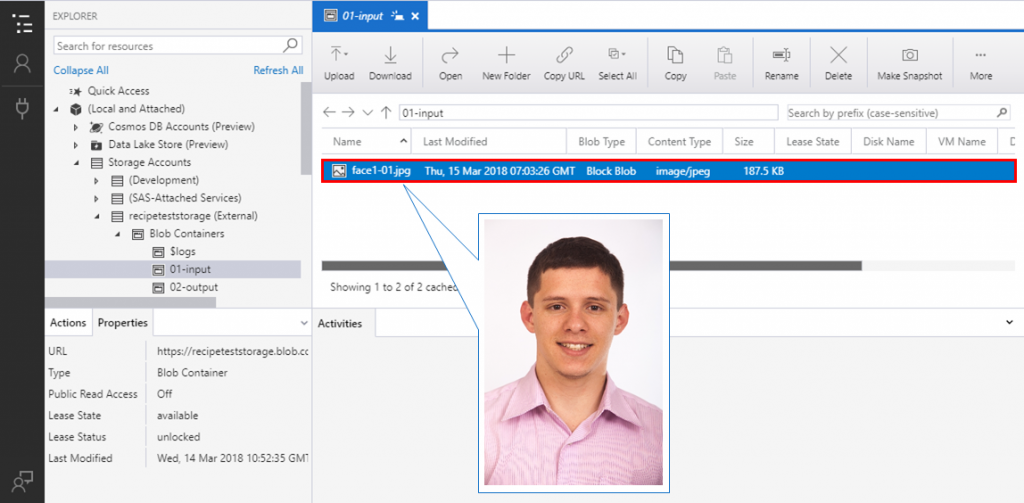
テストとして、男性1人が写ったJPEG画像「face1-01.jpg」をBlobストレージにアップロードしてみます。
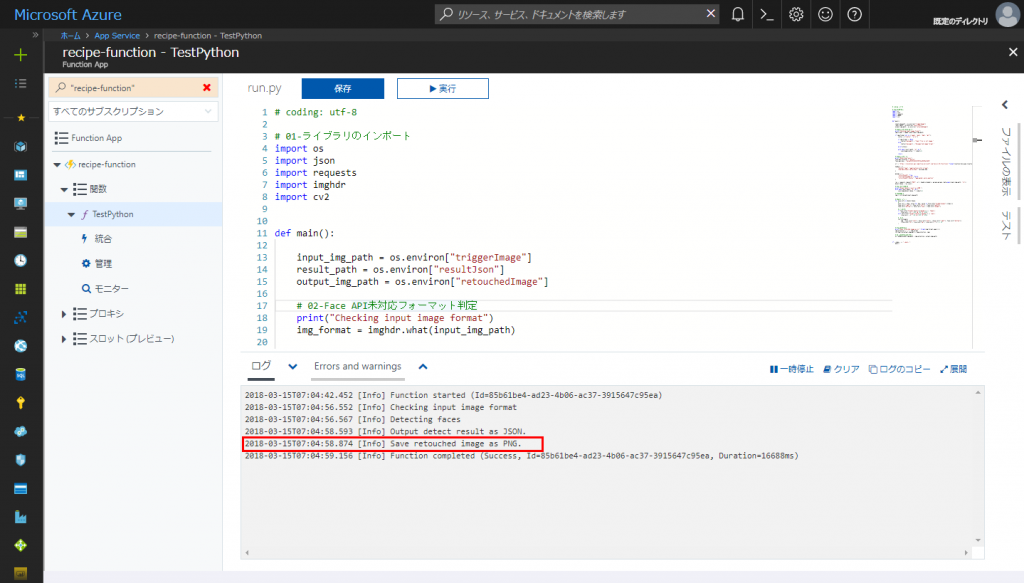
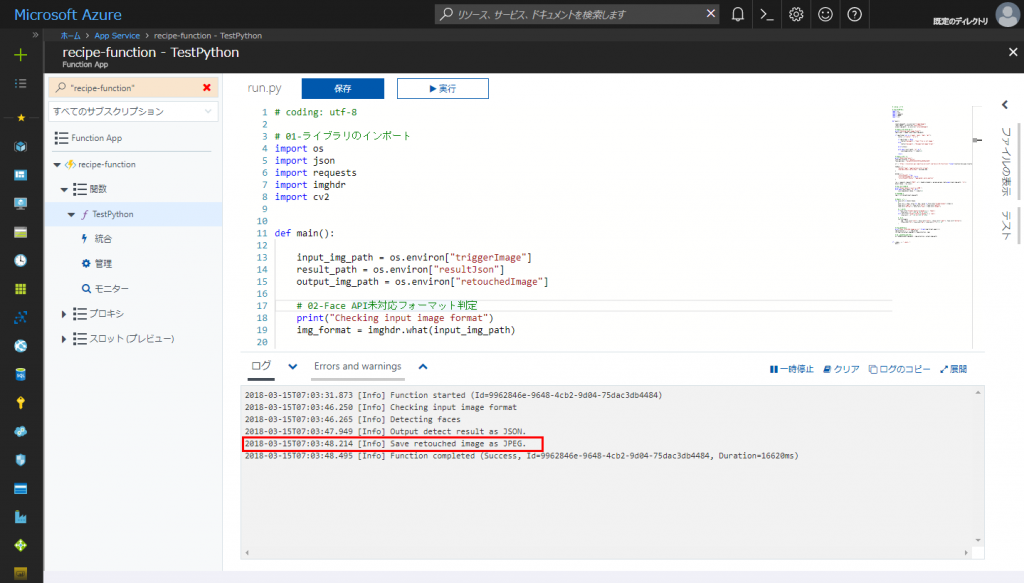
アップロードされるとAzure Functionsが起動し、JPEG画像を保存したログが出力されました
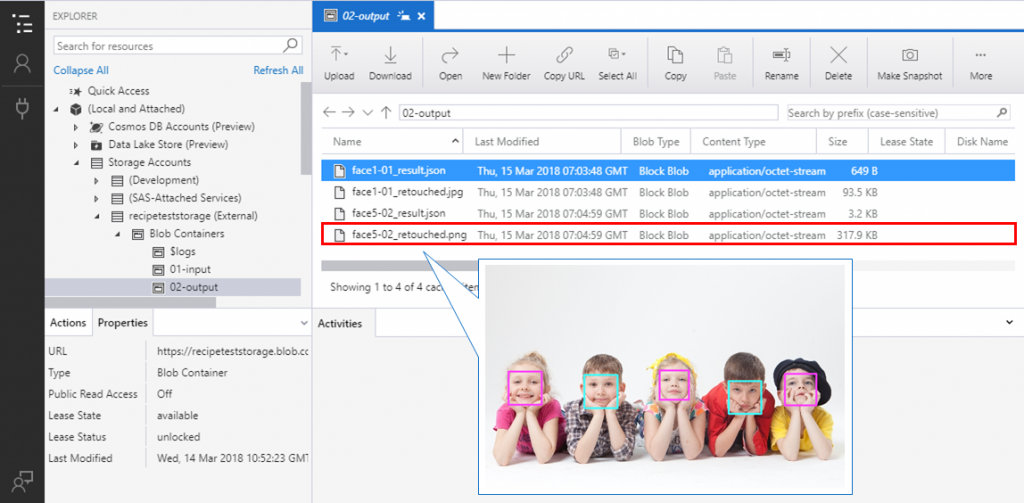
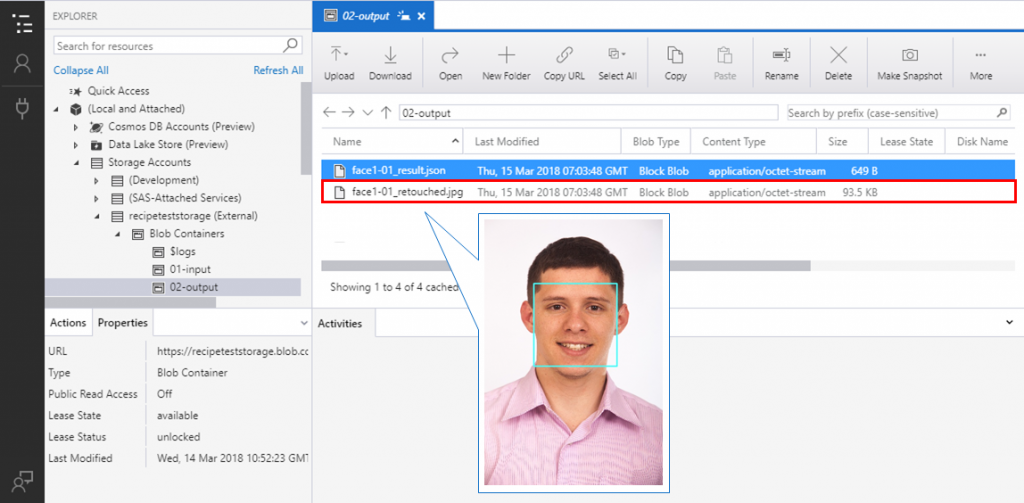
Blobストレージを見ると、関数が完了した同時刻に「face1-01_result.json」とともに、「face1-01_retouched.jpg」のJPEG画像が出力されていました。この画像には、男性を検出したことを示す水色の枠が顔に描画されており、OpenCVで正常に画像加工ができていることがわかりました。
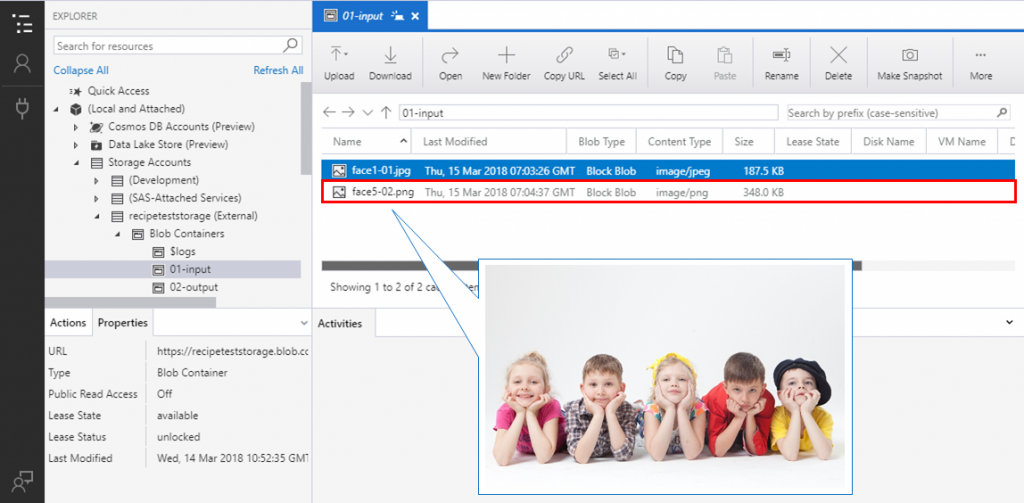
続いて、5人の子供が写ったPNG画像「face5-02.png」をBlobストレージにアップロードしてみます。
Azure Functionsのログでは、PNG画像を保存したログが出力され、フォーマットごとに処理できていることがわかりました。
Blobに出力された「face5-02_retouched.png」の画像を確認すると、5人それぞれの顔に枠が描画されていました。子供のため性別判定は甘いですが、性別ごとに色分けもできていることがわかりました。
まとめ
Azure FunctionsとOpenCVを組み合わせることで画像加工アプリケーションを簡単に構成することができました。OpenCVとFace APIの組み合わせでモザイク処理や黒目線処理も簡単にできるため、アップロードするだけで顔にマスク処理をするアプリケーションも作成できます。
